skip to main |skip to sidebar
Hey friends, its Diwali time. I hope everyone is busy with cleaning and shopping and preparing some mouth watering dishes.
The same with me as i was busy making some beautiful looking diya for this Diwali.
I made this little two diyas this time.
I got some plain diya which is easily available in market and coloured it using acrylic colours and some tube colours.
The colour combination you use matters when you paint a diya. You can do anything to a plain diya. If you are not good with colours and painting then try out using some shells, mirrors, lace etc.
I'm sure everyone liked the diyas i made last year. Look out for my last year's work on Diya Decoration for Diwali.
Look at the one i made now. One more of my little creation on decorating Diya.
 Do comment on how did you like the diya ??
This is not over I'll be back with more decorated diyas tomorrow.
Till then Happy Blogging...!!!Related Posts - Diwali Decorations
Diwali diya designs and patterns
How to decorate diya for Diwali
Colourful Rangoli desings for DiwaliDiwali diya designs and patterns
Here I am back again with fabric painting. Found some old Dupatta and thought of renewing it. Using some fabric colours and some good designs on it. I have made this plane dupatta look beautiful with lot of work on it.
To make this more beautiful you can do a running stitch over the outline of the design and add some beads to it.
This is a simple fabric paint design.
Painting on a banyan leaf is a different painting many of you might have heard of this. It will take a bit time to get the leaf into complete Net condition only with veins on them. I did soak at least 7 leaves and i got only 2 leaves properly out of it as some of them were in a bad condition.
How to make:
1. First of all you need some 2-3 banyan leaves and soak them in water for around 20 days.
2. After 20 days u can see the veins of leaves and other waste aside from the leaves.
3. Now wash the leave carefully in different water and remove all the waste from the leaves very carefully. Do it very slowly and carefully as there are chances of the leaves getting damaged.
4. After washing it and taking out properly you can see just the veins of leaves.
5. Now start painting your imagination on the leaves carefully using some 0-2 number brush.
6. The outcome of leaf painting is really beautiful.
Here is one of my creation.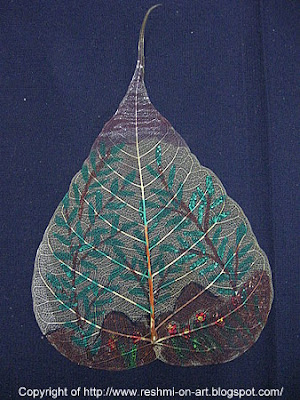
Diya is a small lamp and it is also known as ‘Deepak’ or ‘Deep’. A “Diya” is a traditional candles. The relation of Diwali and Diya is just unique. Diwali is the festival of lights and the Diyas bring light to the world. So here you can make beautiful diya by decorating it. Diwali is the time when you can different designs of diya. You will get decorated beautiful diyas and you can get plane diyas also which you can decorate yourself.
So here are some tips to make your diya look beautiful.
1. Diyas look more beautiful by coloring them with different colors and giving them small floral designs.
2. Decorate your diya with some shells, beads, some glass pieces, golden lace and these decoration are for the plane diya that you will decorate.
3. Here you can even make a diya of your own with ceramic or POP (Plaster of Paris). You can make simple bowl shape for a diya and decorate it or you will get diya moulds easily available in markets. Make beautiful diya out of it.
4. These are some tips to decorate diyas.
So paint the Diyas and light them around your house as you can see handmade diyas look more beautiful and stunning as you light them up and the reflection of small mirror pieces will make your house look more brighter.
So try out and decorate your house this Diwali.
Here is the diyas decorated for you u can see different shapes of diyas.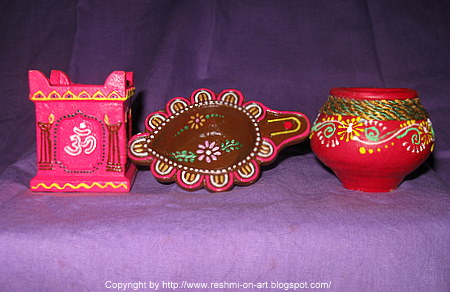
This is another Ceramic pot painting, this one is a different design. You can learn how to make ceramic pot painting from my previous post of Ceramic Pot painting.This piece of work was done in the same way but a different design. You an make any designs like figures, flowers or just tapping some ceramic here and there and painting on them with different colours with ceramic dough. So try out some different designs.
This is the new piece I made out of ceramic.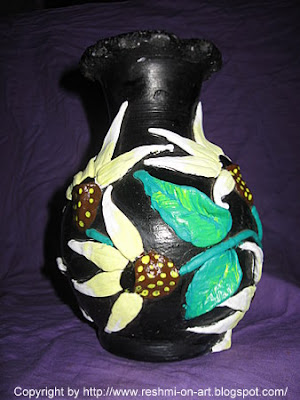 Ceramic Pot Painting is always a good showpiece.
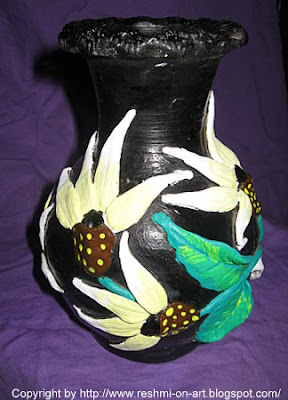
Holi celebration begins with lighting up of bonfire on the Holi eve. One of the major festivals of India, Holi is celebrated with enthusiasm. This festival is celebrated with colours and water filled balloons.
In the same way our Warli tribals also celebrate Holi festival with colours on each other and lot of fun.
This is how our Warli tribes celebrate.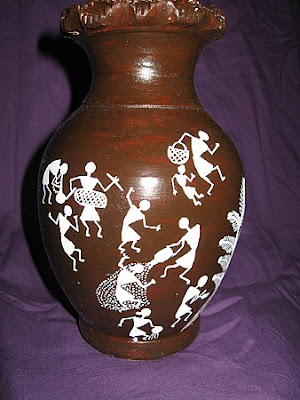
A Warli village has been presented in this painting with huts, trees, animals and people. Men and women are seen cooking food, milking a cow, drawing water from the well, and carrying earthen pots filled with water on their heads. Women rearing babies, farmers with crops and cows. Warli painting shows an inseperable bond between men and nature. Domestic animals like hens and cows other animals and birds are also seen in the pictorial space.
My earlier posts of Warli painting refers to the whole bonding of warli culture, their festivals and their dance forms.
Here I am back with something more on Warli painting. Today will show a Dance form of Warli painting.
In my earlier blog I have discussed about Tapra Dance and that dance shows the whole festive culture of Warli.
This painting is only on the Warli dance that they specially perform on all their occasions. The women tied their hair in one single knot and the men with the instruments. Most of the Warli paintings you see will have this Dance form in it as that adds the beauty to the Warli culture.
I'll come up with more of Warli culture paintings..
Here is the Warli dance.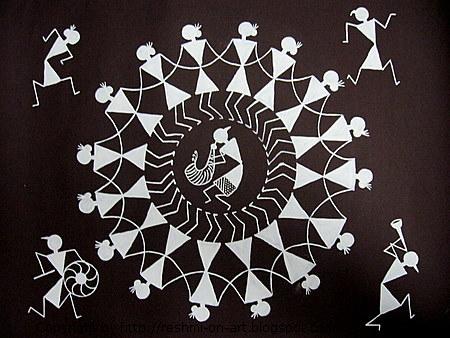
A very interesting thing that I would like to share with you all showing a very simple creativity by Egg painting. Any one can do this creative art but, with lot of patience. When doing egg painitng you need to be very careful so that the egg does not break. So hope you all ready to try out.
Materials:
1. Egg
2. Big needle
3. Colours
How to start with:
1. Puncture a small hole at the small and large end of egg with a big needle.
2. Place egg over a bowl and blow through the small hole until all of the inside is removed and rinse the shell with cold water and let it dry.
3. Now apply acrylic paint, select any colour and paint the egg with layer of colour and allow it to dry (approx 30 mins to dry).
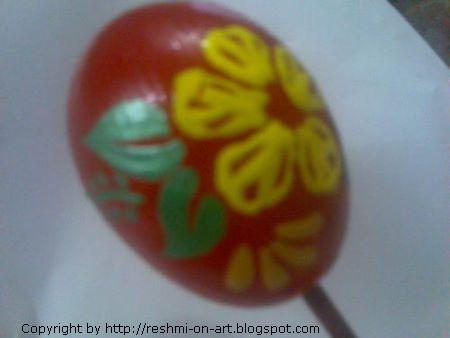
4. Now its your own wish use your imagination and paint any design on the Egg.
5. If not good in making any design you can decorate the Egg using sequens golden threads some tiklis sparkles etc.
6. You can even make different birds and animal with some imagination according to the Egg shape.
So try out all possible things that you can.
Try this simple creativity and you will get amazing results.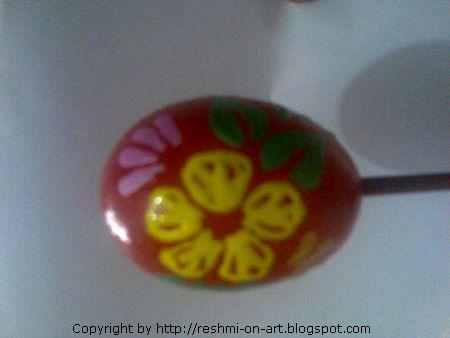
Leaf Painting is a unique kind of painting that can done on fabric or any materials that you would like to paint. Today here I'll let you know about Leaf painting on fabric material. Plain fabrics can be made attractive by leaf painting. This is a very simple painting even kids can try out. The painting can be made more attractive by using proper colours.
You need is:
1. Fabric Paint
2. Brush
3. Leaves (any size and shapes with thick vain)
4. Fabric that you wish to paint.
Procedure:
1. Firstly take leaves that you got make sure those are thick vained leaves to make the painting look very natural and colour the leaf on the back side completely with the chosen colour.
2. Now stick the leaves on the fabric and press well.
3. Leaves can be stuck according to your choice as it suits the fabric and now let the fabric dry for atleast 24Hrs.
4. After the painting gets dry do iron the design from back side so that the painting could last longer.
Note:
1. Before making the print on the good material it is better have a trial on a rough cloth.
2. You can stitch some sequences and beads to make the design more attractive.
Here are pictures for you.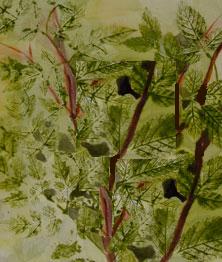
Bangle Painitng, yes a very simple thing if you gone through my other posts and got the idea of using colours and designs.
The same idea and technique should be used for painting a bangle.
Method:
1. You can easily get a broad wodden bangle from any accesories store.
2. Colour the bangle with any colour of your choice.
3. Then add any design of your choice over it.
Simple and you finised with a beautiful Bangle Painting.
Here is some for you.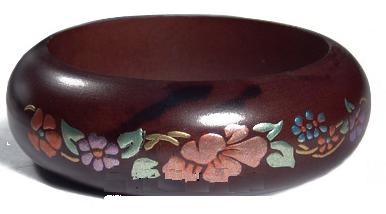
This time is a different painting. Its painting on Aluminium Sheet. Need lot of hard work to complete this painintg. This is fun and easy to do and let us start how to learn this beautiful painting.
Materials used for Metal Emboss painting.
1. Aluminium Sheet
2. Craft Paint Brushes
3. Trace of design
4. Golden anti rust liquid
5. Cotton
6. Kerosene
7. Ball pointed penEmbossing Tools: Method of Embossing:
1. Stick the trace of the design to the four corners of the aluminium sheet. Using the ball pen trace the design over the trace paper using pressure, so that the impression would look clear on the aliminium sheet.
2.Put dots around the design with a small hammer, you will get this hammer along with the Embossing tools. This dots around the figure that needs to be embossed will make the art look more attractive.
3. Keep a cushion on a flat surface and place the reverse side of the picture on it and emboss the picture by pressing hard with the embossing tools. The force used should be a bit more to get good results and when turned on the front side,the picture will be embossed (projected).
4. Now use golden anti rust on whole metal and make sure the background should look more dark than the actual picture.
5. To give lighter shade to the picture take some cotton and keep it inside the cotton piece of cloth and dip it in kerosene and rub it over the actual picture so that the excess anti rust solution will be removed.
Use proper tools according to the picture, be patient and get amazing results.
Here is a super Metal Emboss Picture.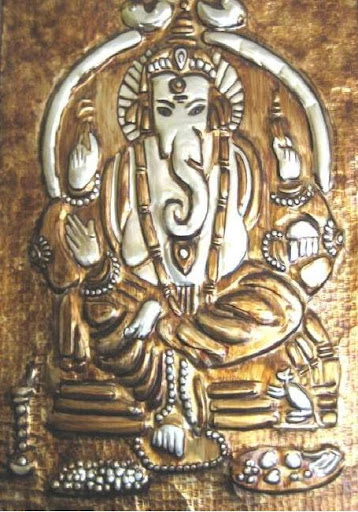
Stroke painitng is just like sweeping with colours. Its simple & fun to do. You will get great results even if you are painting for the first time. Stroke painintg is a very popular art. It is very attractive, less structured style that lends itself to freehand painting. Its actually different to pattern paintin that we were doing all this time. Stroke painting can be done on metal, plaster, glass, wood, fabric and ceramic surfaces. Its basically blending, shading, and highlighting all in ONE Stroke.
All you need is:
1. Colours
2. Surface on which you would like paint
3. Brush
Dip your brush on different colours and just give the srokes on ways you want and get beautiful colourful strokes. Try it out u'll be excited to see the results.
Here is a Stroke Painting for you.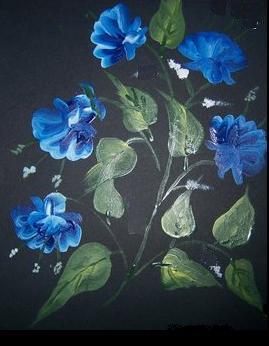
Dry brush painting is something to do on a rough surface like canvas, wood. Dry brush painting gives the surface a scratchy effect. Dry brush the name itself says no water at all. In this painintg brush is just dipped in the colour and start painting directly.
Methods of painting:
1. The brush should be moved across the surface rapidly to get a natural effect.
2. The brush should be filled with paint.
3. When you start a stroke the start colour should be fresh on the first and then should be light as it goes further.
4. Dry Brush utilizes no water or medium other than paint to wet the brush.
5. Dry brush painting give a very good effect on wet surface.
6. A dark and light colour shades are a good combination for dry brush painting.
This is a beauiful Dry brush painting.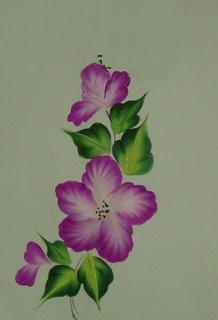
Yes again Stencil Art, but this time we'll learn Stencil painiting. Yes a bit different to earlier one (Stencil Making).
Materials:
*The same that is needed for stencil making*
1. Colours
2. Dry brush (Thick one)
In stencil painting the only difference is u should cut the stencil design in card paper instead of felt cloth. Once you are done with stencil cutting on card paper use any material u would like to paint, for eg: hard paper, felt cloth, cotton cloth, wall, glass etc.. Place the stencil design over the material and apply colour using dry brush on the surface of material (inside the stencil) or even otside the stencil design if you need some more difference in design.
Here is a sample design to show you how it looks.This is made by making a simple flower design and by following the above instructions.
Why only dry brush?
This is because if water is applied on the colour or brush there are chances the colour may spread around. So be careful to use only dry brush.
Now this is about normal brush when you need to paint inside the sencil, you can even try using diff materials for colouring the material with stencil.
Different tools you can try with:
1. Cotton (while using cotton just dip the cotton in the colour and dab it on the stencil the design will be on the material of its own)
2. Sponge
3. Toothbrush (spray it all over the stencil design)
Try this out using all these tools and see the results.
Here is a stencil painintg for you.


